One of the many concerns of computer users these days is how to deal with unnecessary or unwanted changes that occur during or after a windows update. While Microsoft carefully rolls out these updates over-time, sometimes, the problems in question are beyond repair. That is why many turn towards fresh installation.
However, while many understand how to do it without any trouble. Some may find it difficult and may require guidelines or step-by-step guide in order to successfully execute this task. In order to make it easy for an average user, we are making this article to help them get through this process without any hassle. Therefore, let us jump right into it.
-
Buy/Download The Windows

The first step in any windows installation is the setup file itself. How do you obtain it exactly? You can simply go to Microsoft’s website or Google the keywords itself i.e. “Windows 10 download,” and you will find yourself on the landing page of windows download. After providing adequate information and successfully buying the windows, the website will provide you with a key and a link to download the windows. It should not take more than a couple of hours at an average downloading speed.
-
Necessary Equipment
This is another thing you may need to buy or borrow in order to install the windows successfully. You can buy any average pen drive with basic features online. Keep in mind that the USB device must have at least 16Gb of space. However, then you will have to burn that image into the pen drive using Rufus or other such software.
-
Hardware Check-In Bios
This is a step where many average users mess-up so listen carefully. While there are many different motherboard manufacturers out there, most of the time, the bios will have some basic settings. You will have to find it according to your bios. Most likely, they will be in start-up sections. If your hardware is intact, check that your ram, hard drive, and other important devices are successfully showing up in the bios. Then you will have to ensure that the first boot device is set to your pen\usb drive.
-
Installation
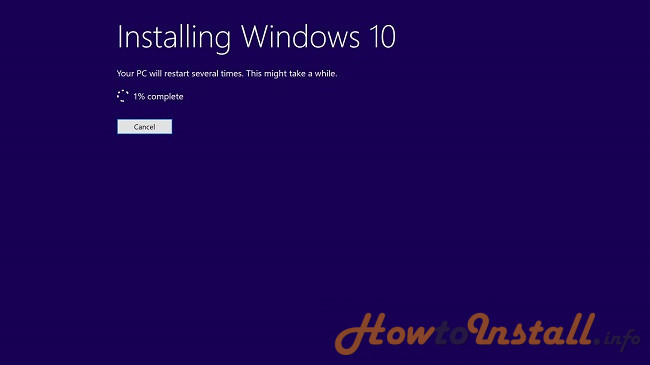
The installation itself would require you to be patient. Not because it will take time, because it will not. The thing that requires patience is the setting up and everything in between. Once you have connected the pen drive and booted your computer from the USB, you will be presented with the following.
-
Windows Setup
This option will let you select the windows version (if you downloaded the file with multiple options) and other basic options like language selected. It will be pretty easy and straightforward.
-
Drive Select
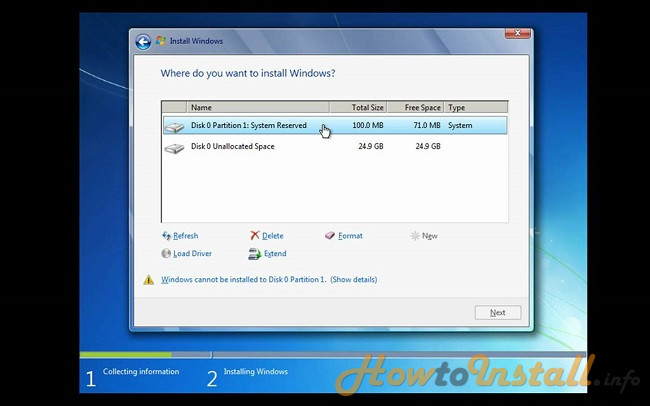
This is a tricky part where the beginners are very vulnerable to destroying their valuable data. Keep in mind that the drive letter C: is usually the logical partition where windows is installed. Therefore, delete/format nothing except it; leave the others as they are. If your computer is operating on multiple devices, then disconnect the ones that do not feature the windows.
-
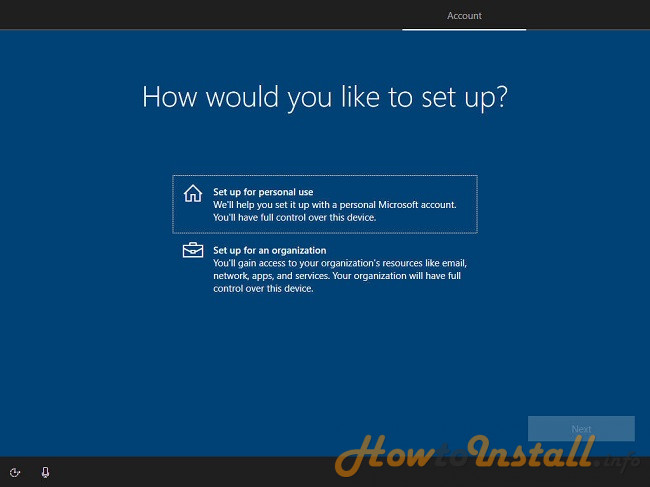
Setting
Wiki Creators Inc expert suggested that the installation itself would take up less than 10 minutes. Once done, it will restart into a new flash screen to set up your devices. After following the on-screen instructions, you will be forwarded to your desktop screen.
-
Necessary Programs

Once you are on the desktop, you would have to install necessary drivers from Start Menu>Control Panel>Device Manager. Then you can install any software that you require i.e. Microsoft Office or media player of any kind. Then enjoy your freshly installed windows!