Many people convert HTML to WordPress or switch formats to move their blog to a better platform. In this article, we are discussing the method to move custom Blogger domain to WordPress. Blogger is a popular and free blogging service which allows subscribers to have personalized domains. It is a good platform for beginners who want to hone their skills. However, once they get some experience, the limited personalization options force them to look for suitable alternatives. It does not provide as many monetization options as WordPress. People looking to switch custom domain blogger blogs to the open-source CMS must use the following process:
1. Alter The DNS Settings
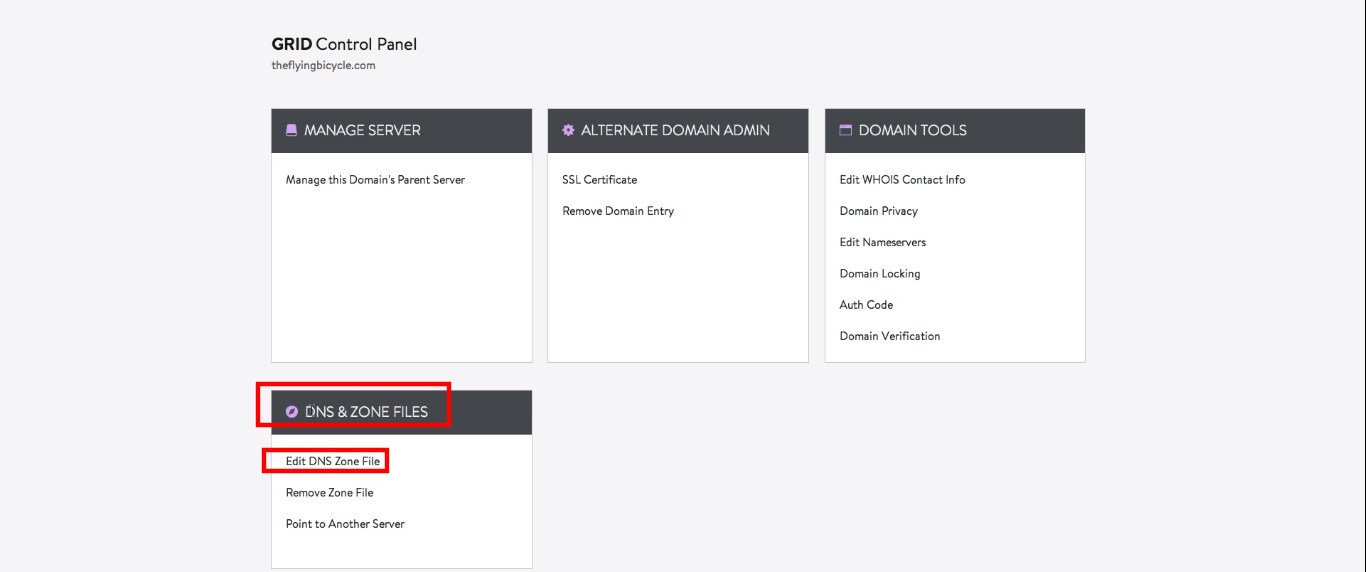
The first step is to subscribe to a reputed dedicated WordPress hosting service. Choose one which is offering a plan which suits your budget and requirements. You will now have to change the DNS settings of your domain in the hosting account. Blogger subscribers are allowed to use third-party registered domains. They have to provide CNAME and A details in the DNS settings. These records now need to be deleted. Log in to your hosting account and locate the “Manage DNS” option. Click on it and locate the DNS Zone File.
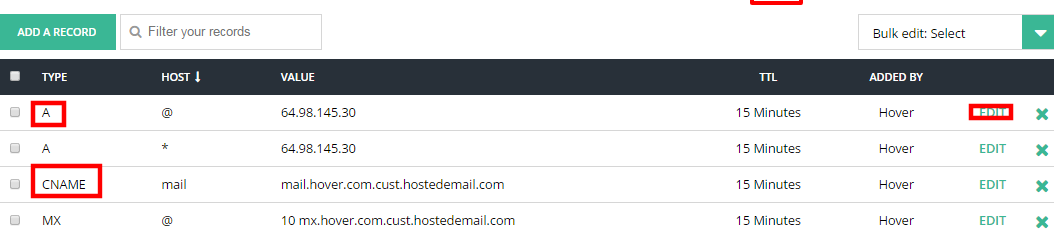
Open the Zone File editing screen and delete the CNAME and A records and save the changes.
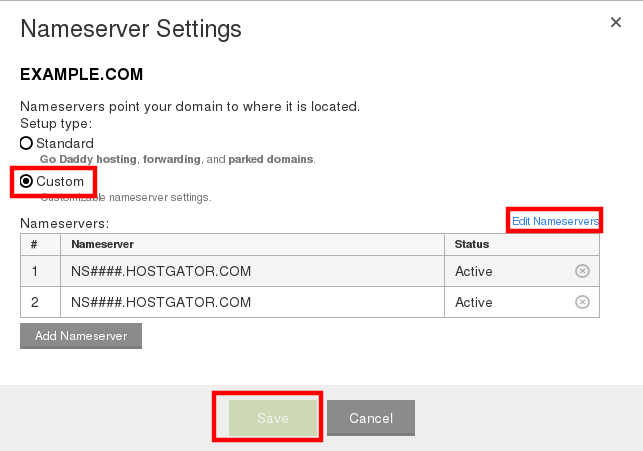
Now go back to the “Manage DNS” option and open the namserver settings section. Select the “Custom” option on the next screen and click on the “Edit nameservers” link. Enter the new WordPress host’s nameservers details which can be accessed from the service provider’s documentation or other support material. Save all the changes. Remember that all the modifications can take up to 48 hours to propagate fully.
2. Remove Domain Redirect From The Blog
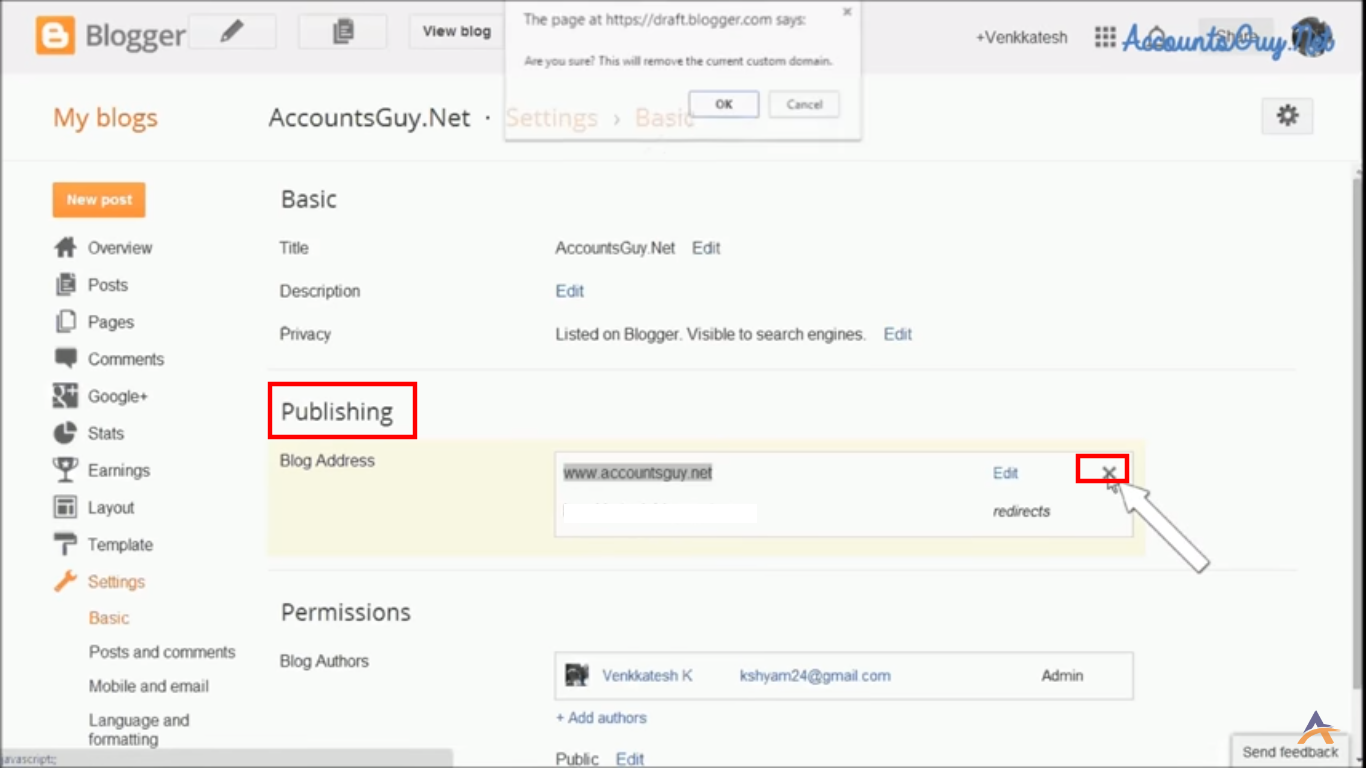
When you set up a custom Blogger domain, it’s original blogspot.com redirects visitors to the new location. This redirect must be removed now as the DNS settings themselves have been modified. Log into your Blogger installation and go to “Settings > Basic”. Locate the “Publishing” section on this page. Under it, you will find the “Blog Address” field with your custom domain listed. You will see the “X” icon beside the domain name. Click it to remove the redirect and move to the next step.
3. Download And Install WordPress
Find out whether the DNS of your domain has propagated or not. If yes, go ahead and download the core files of the WordPress installation in cPanel on your hosting account. In case, the domain is not registered with the current hosting service but another agency, then the hosting must be added for the domain. All major hosting services provide the feature to add an unassociated domain. Your dedicated WordPress hosting service will provide the facility of installing WordPress in a single click.
4. Export Blogger Blog’s Content
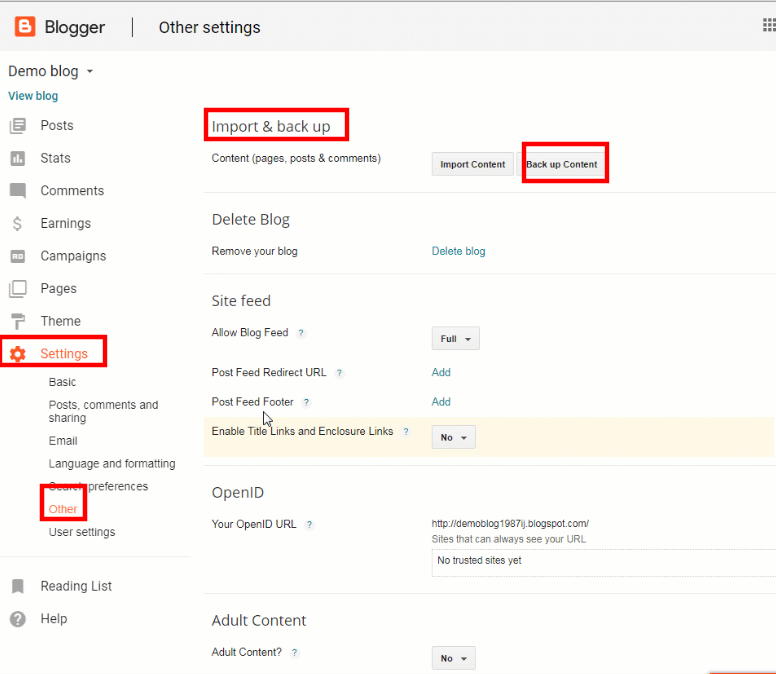
In this step of the process to shift a custom Blogger domain to WordPress, we will export the old blog’s content. We will do this by compiling the content in an XML file. Log in to the control panel of your Blogger installation. Select the “Settings” option in the menu and go to “Other”. In the “Import & back up” section, you will see a tab named “Back up Content”. Click on it and a pop-up will appear. Select the “Save to your computer” option and the file will be stored on your computer.
5. Import The Content To WordPress
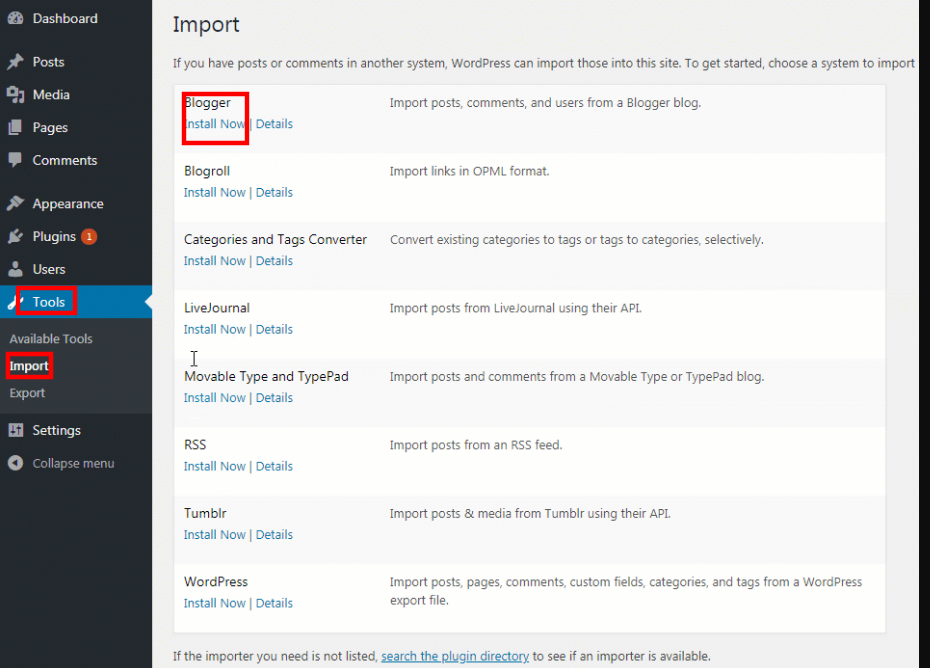
Once the file has been successfully downloaded, log in to the admin dashboard of your WordPress installation. Click on “Tools” in the menu and select “Import”. The option for Blogger will be listed right on top of the screen. Hit the “Install Now” link displayed below it to download the importer tool.
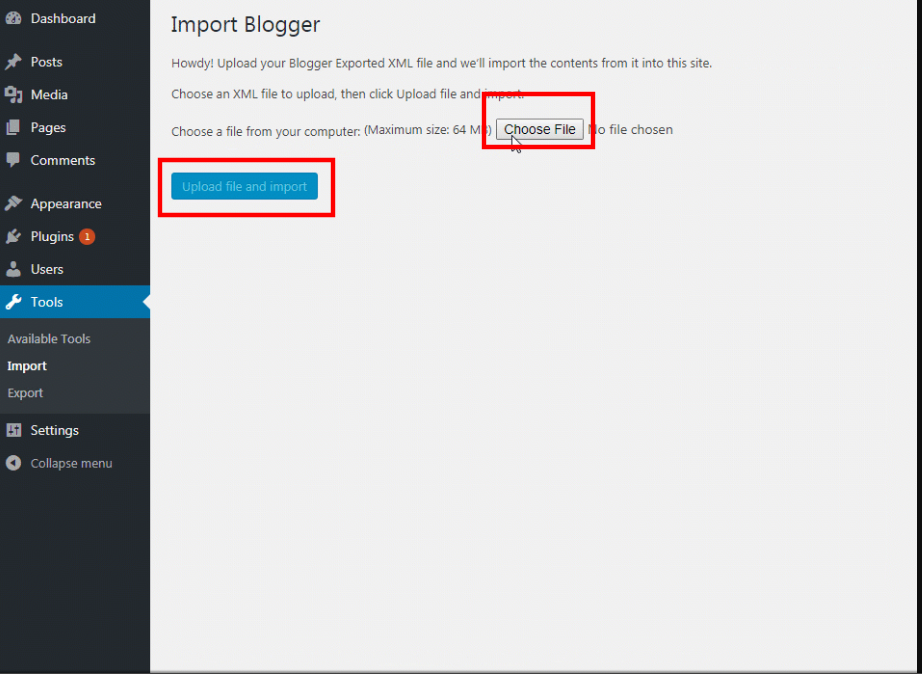
As soon as the installation completes, the link will change to “Run Importer”. Clicking on it will take you to a new screen titled “Import Blogger”. Press the “Choose File” button and select the file downloaded in the previous step. Then select the “Upload file and import” tab to bring in all the content to its new home.
You will have to assign an author name for all the imported posts. The process to migrate a Blogger blog is technically complete. However, you must conduct the next two steps to make it easy for visitors to find the new blog.
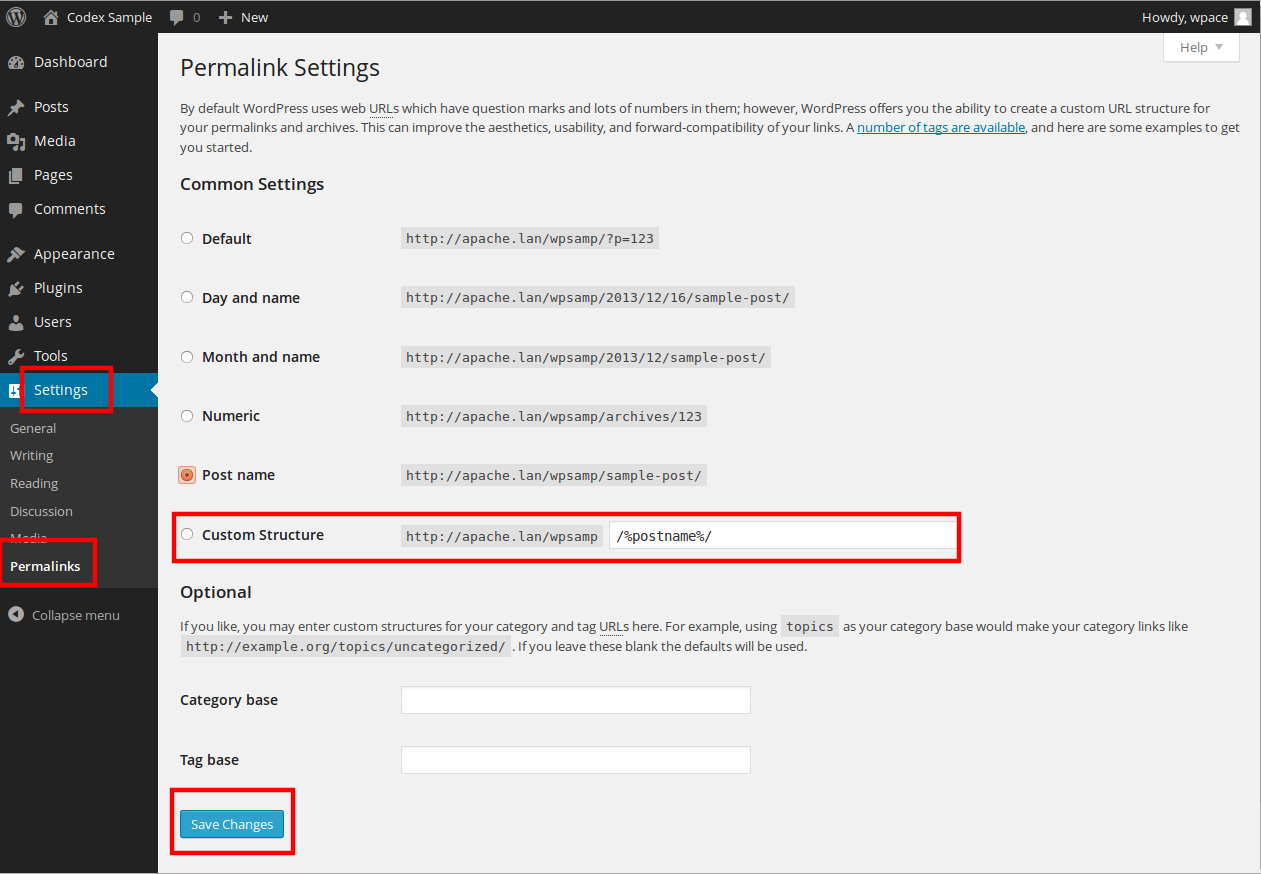
6. Create A Permalink Structure
Create a permalink structure for all the imported content which is similar to the Blogger URL composition. Go to “Settings > Permalinks” and paste the following line in the custom structure field:
/%year%/%monthnum%/%postname%.html
7. Set Up Redirects To The Blogger RSS Feed
In order to enable your Blogger blog’s subscribers to continue receiving RSS feed updates, you will need to set up redirects. Use an FTP client to access the root directory of your WordPress website and locate the .htaccess file. Add the following code at the beginning of the file and save the changes:
<IfModule mod_rewrite.c>
RewriteEngine on
RewriteRule atom.xml /feed? [L,R=301]
RewriteRule rss.xml /feed? [L,R=301]
RewriteRule ^feeds/posts/?.*$ /feed? [L,R=301]
RewriteRule ^feeds/comments/?.*$ /comments/feed? [L,R=301]
</IfModule>
Upload the file on the server to conclude the migration process.
Conclusion
This simple process to move custom Blogger domain to WordPress will help people access a much more flexible and versatile platform. It will help in improving the visual appeal of their blog and exploit it for earning revenue.